
Have you ever watched on TV those fashion shows where they take some $3500 outfit and they “remake the look” for under $100.
Today, we are going to do that with a planter. Check out this “grow bottle” priced at $35.00, it’s pretty cool, a conversation starter.

But you can make a planter and produce better results for about $1, FREE if you have a source for the materials.
Over watering of plants happens everyday. Sub-irrigation can help eliminate the over-watering problem in your plant care.
Let me introduce you to what we call “SIP’s” – Sub Irrigation Planter often called “self-watering” planters. They work by capillary action, where the plant “pulls” water as needed for it’s environment.
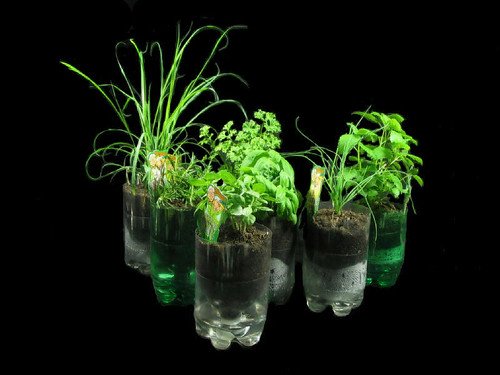
These SIP’s are functional, educational and recycled… from repurposed plastic soda bottles.
Excellent “plumbing” for your plants indoors and out plants, and there lots of way to hide them.
Watch this Slideshow on Flickr from Inside Urban Green.
Breaking Down Soda Bottle Planters by Size Volume
4″ pot = 1 liter bottle planter
6″ pot = 2 liter planter
8″ pot = 3 liter planter
Off With The Label
Removing the label is step one.
I use hot water from my kitchen sink. I fill the bottle with hot water, which loosens the adhesive. With scissors or knife I cut the label and peel it off. Some have used a hair dryer (beware plastic melts). However, I learned a long time ago NOT to use my wife’s hair dryer for anything plant related.
Honestly, I do not spend much time on the labels as I cover them with containers.
Time to Cut the Bottle
Place a Sharpie or some kind of permanent marker on top of a 14 oz can (this is approximate in height), rotating the bottle making a straight line for a cutting guide.
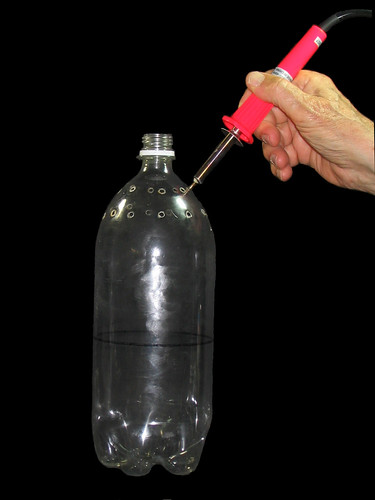
Pokin Holes
The next step is to poke holes in the top and neck of the bottle. I use a knife, other suggestions are an ice pick, heated metal skewer, soldering iron.
Cutting Time
Next I use a razor knife or box cutter to create a slit on the previously marked line. Then take the blade of your scissors and poke it into the slit and carefully cut along the marked line. Usually this a rough cut and I’ll come back and clean up both sections.
The objective is to get the top of the neck to touch the inside of the bottom. This may take a few cuts.
Usually some sharp, jagged edges are left on the first cut. A smooth trimmed cut is nice for aesthetic reasons.
I cut holes, (about 5) in the bottle cap, where the soil will be held inside the planter. The image shows a “wick/soil retainer” (approx. 1″ by 3″) made from polyester batting material (felt).
Add some potting mix on top of the bottle cap or wick/soil retainer. Using a finger, wood dowel or some other tool tamp the soil down firmly.
This will keep the soil in contact with the water for capillary action to take place.
The potting mix will by itself work like a sponge and provide wicking by capillary action. I use LECA stone.
This SIP planter is both functional, permanent and virtually eliminates the headaches associated with over watering. The problem of over-watering has claimed many an indoor plant.
You’re now ready to plant whatever it is that you’re going to grow.
Image: Bottle Planter
Slide Show: Inside Urban Green
Comments on this entry are closed.